

How to create translations?
Step 1: Access the Strapi admin panel.Step 2: Go to the Littlebox Strapi Suite.
Step 3: Select “Translation”.
Step 4: Click “Create new entry”.
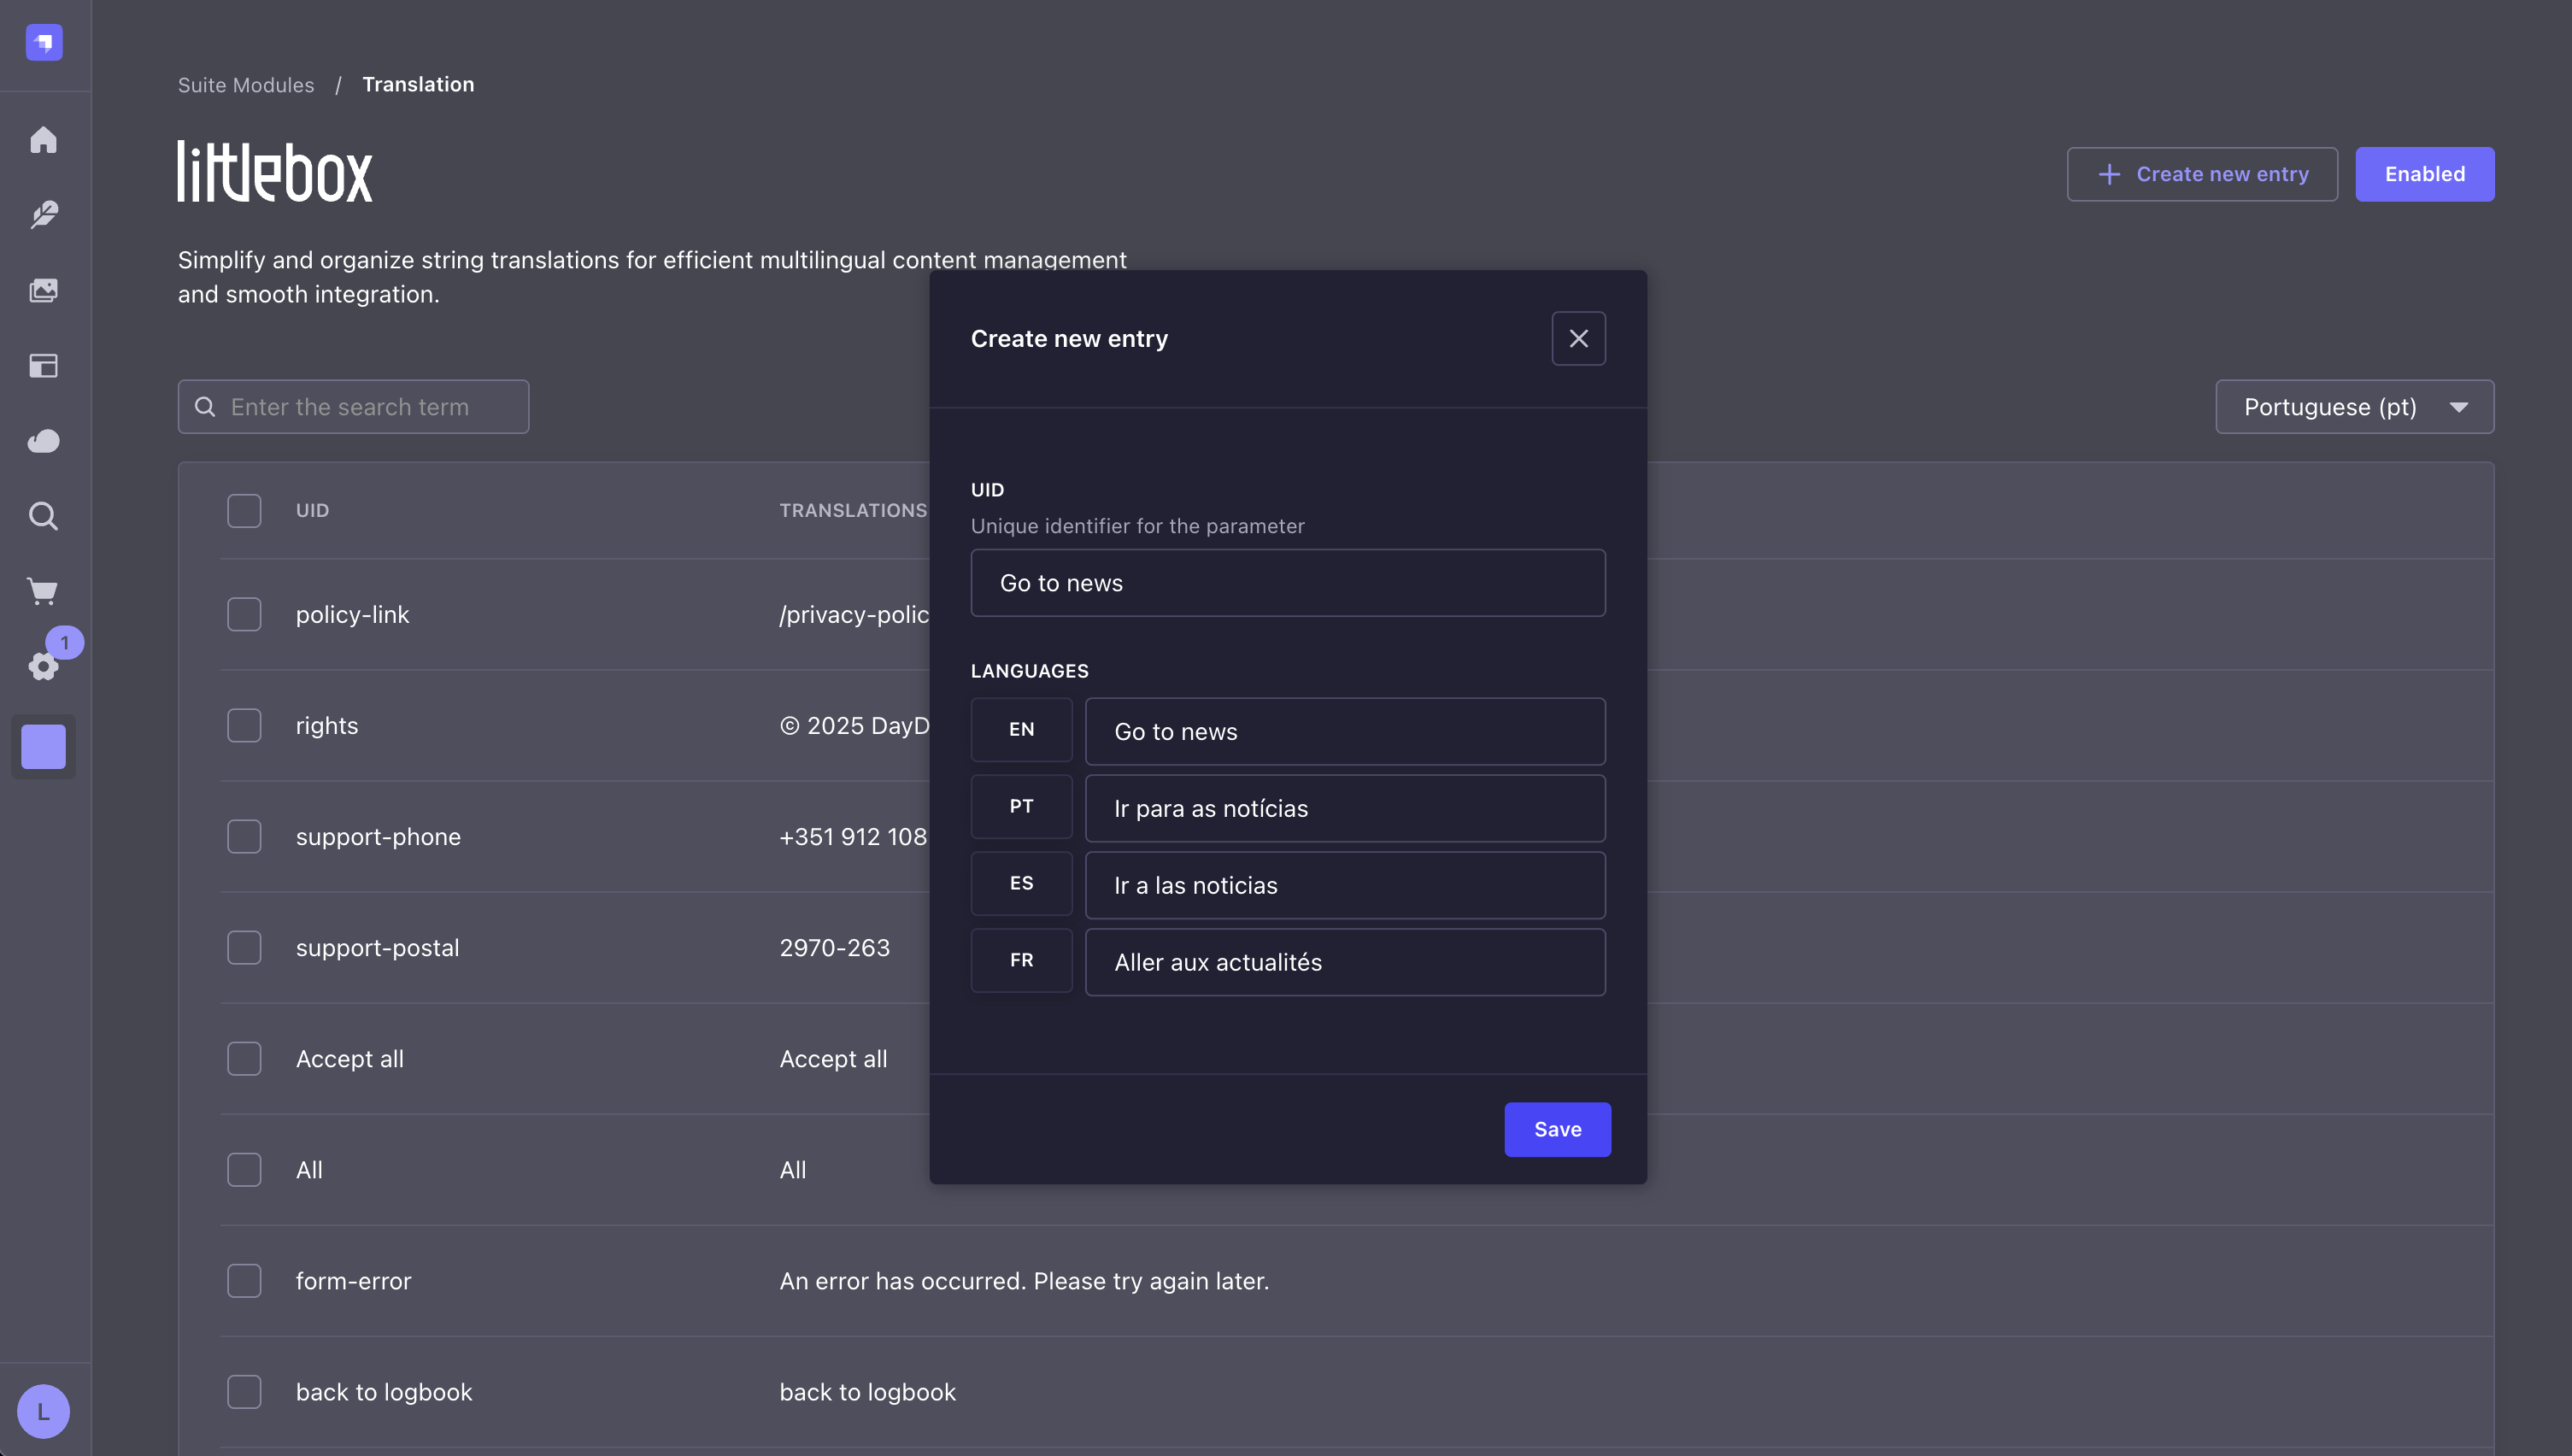
Use simple text as the UID for short content, or use an ID for longer or more complex text. In the example above, the text itself serves as the UID because it is simple. However, if it is necessary to include, for example, HTML, use an alias as the UID.
Translate with AI
The module can write the translations for you, using the OpenAI API. It works in two places: on the module list, where it translates the entries of the module itself, and on the content manager, where it translates a whole document. The prompt is written to produce copy that reads as if a native speaker had written it, not a literal translation. It replaces idioms and figures of speech with the expression a native speaker would actually use in the same situation, keeps the register and the length of the original, never uses hyphens or dashes to join ideas, and leaves placeholders such as{name} or %s, HTML tags, URLs, email addresses, numbers and brand names untouched.
The translations are generated by the OpenAI account that owns the API key, and each one is billed to that account.
Settings
Step 1: Access the Strapi admin panel.Step 2: Go to the Littlebox Strapi Suite.
Step 3: Select “Translation”.
Step 4: Click “Settings”.
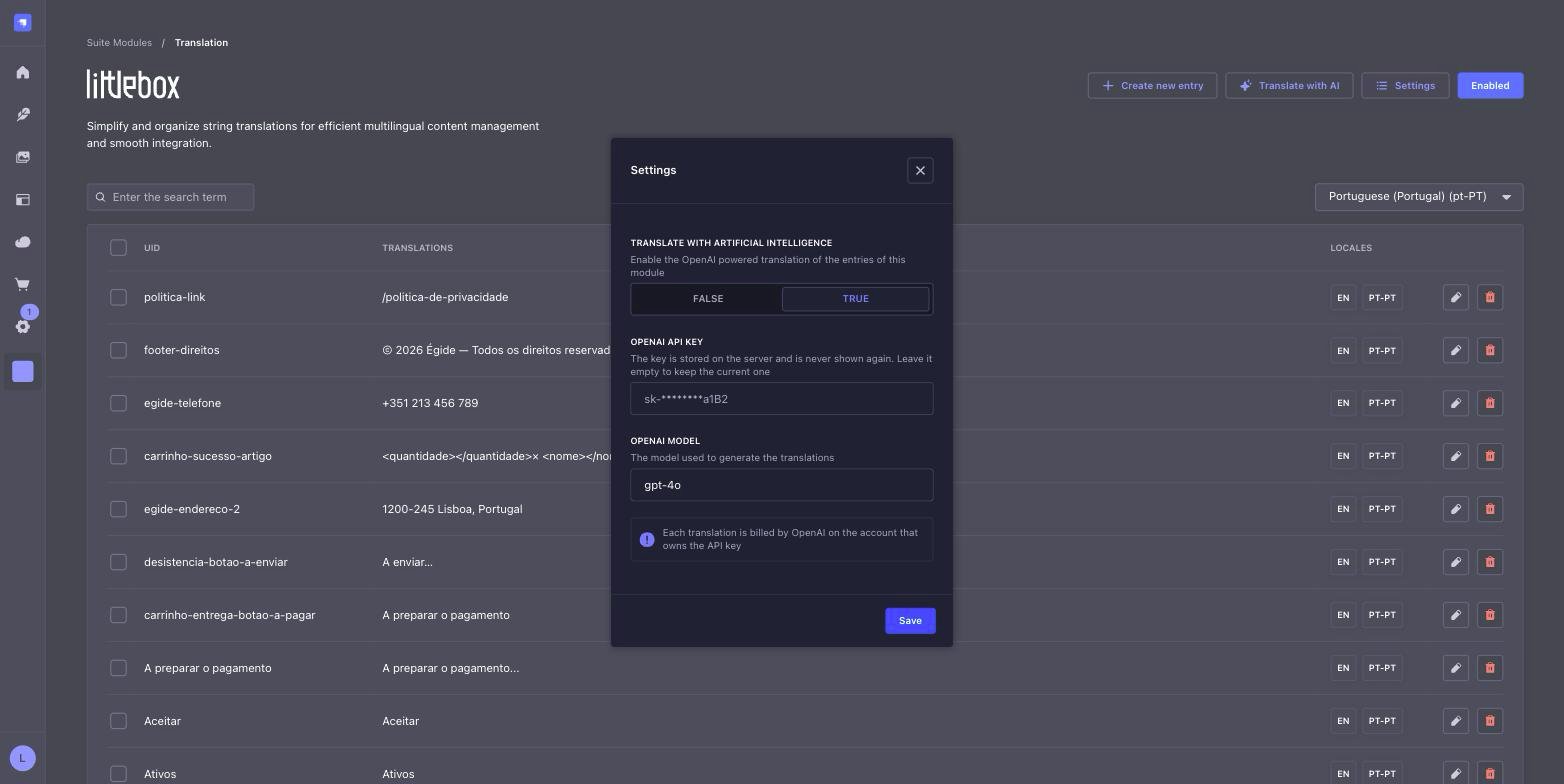
Turns the feature on. While it is off, nothing changes in the admin panel and no request is ever sent to OpenAI. OpenAI API key
The key used to generate the translations. It is stored on the server and is never sent back to the browser: the field shows it masked, as
sk-********a1B2, and leaving the field empty keeps the key that is already stored. To
replace it, type the new key and save.
OpenAI modelThe model used to generate the translations. It defaults to
gpt-4o. Any model served by the OpenAI chat
completions API can be used here.
Translate the entries of the module
Once the feature is enabled, a “Translate with AI” button appears next to “Create new entry”.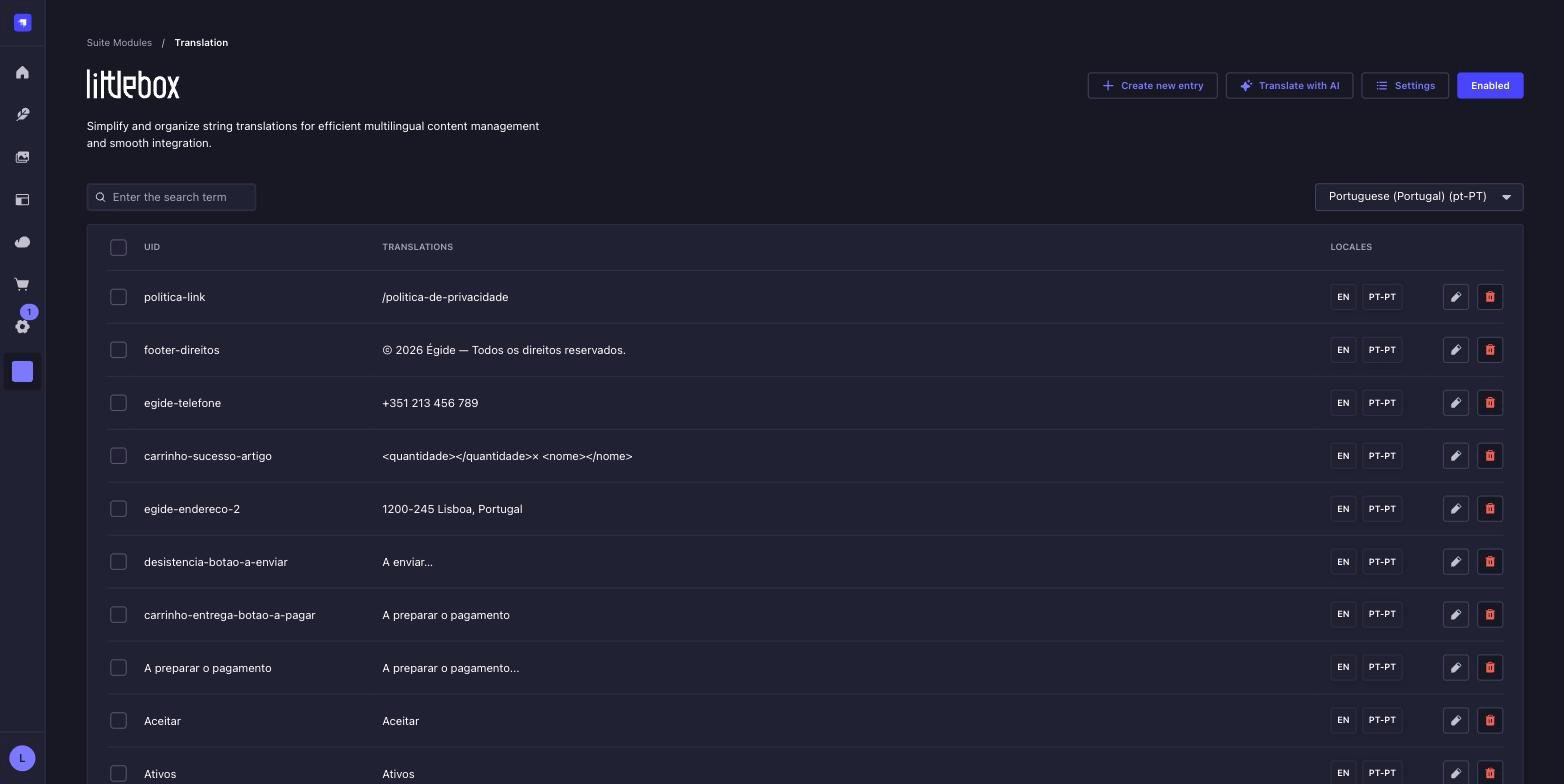
Step 2: Pick the base language, the one the entries are translated from.
Step 3: Tick the languages that receive the translation.
Step 4: Click “Translate”.
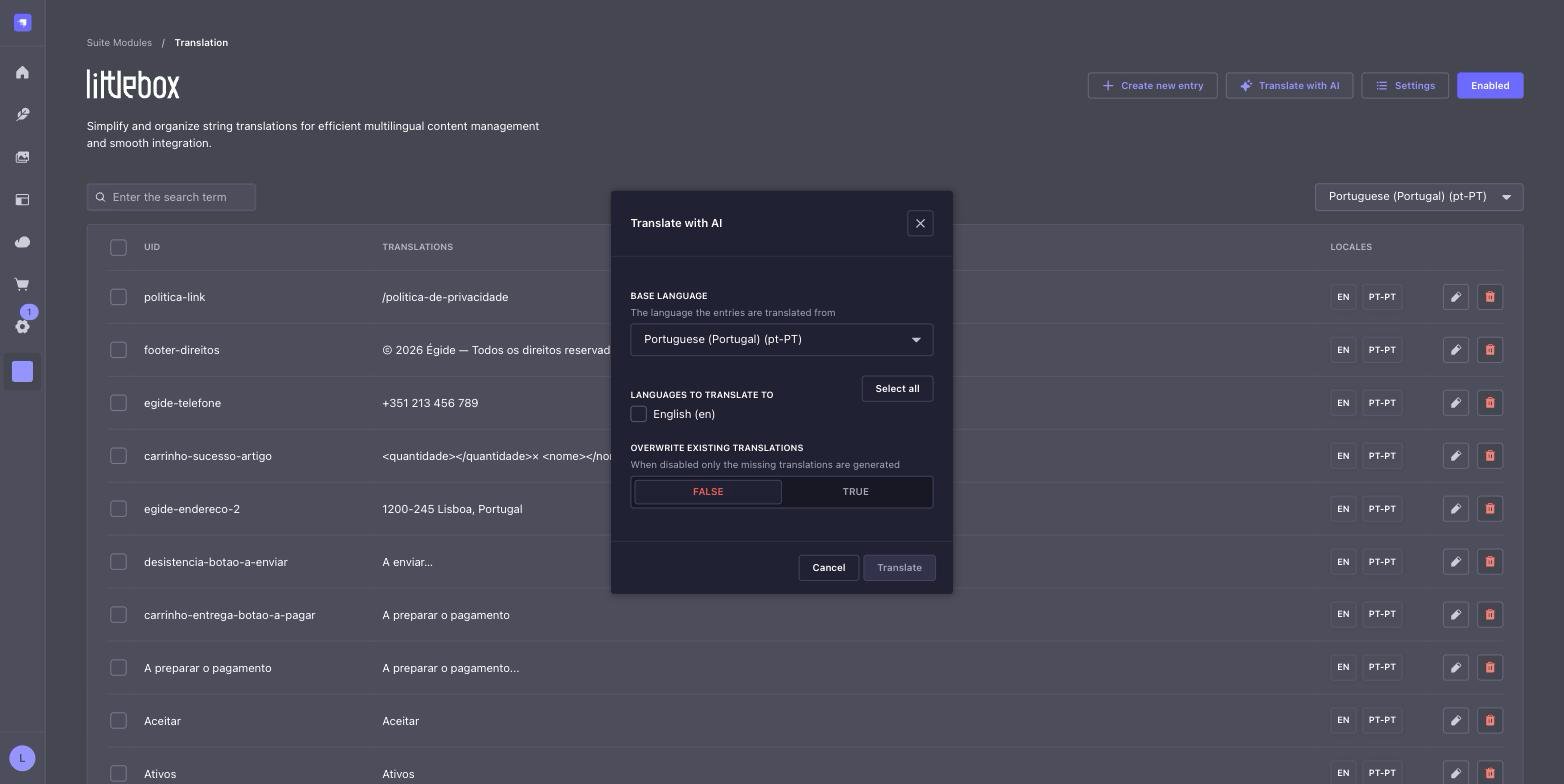
When it is off, only the missing translations are generated and the ones already written are left as they are. When it is on, every entry is translated again in the languages that were ticked. Every entry of the list that has content in the base language is translated, not only the ones that are visible or selected. When it finishes, the modal reports how many translations were written, how many were skipped and how many failed, and the list is refreshed.
Translate a document
The same feature is available on the content manager, for collection types and for single types. Open a document in the language you want to fill in and the “Translate with AI” button appears in the panel on the right.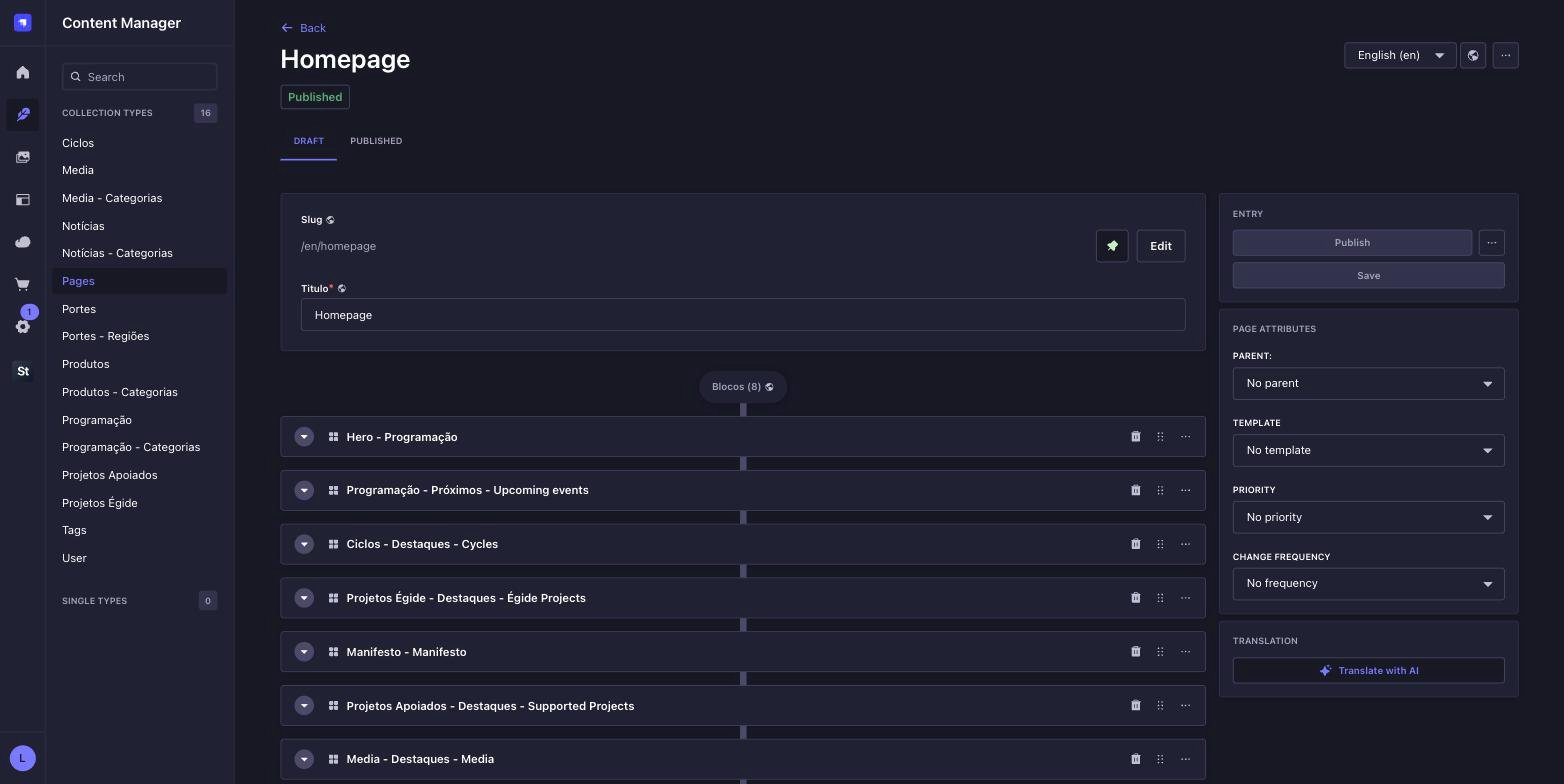
Step 2: Pick the base language, the one the document is translated from.
Step 3: Click “Translate”.
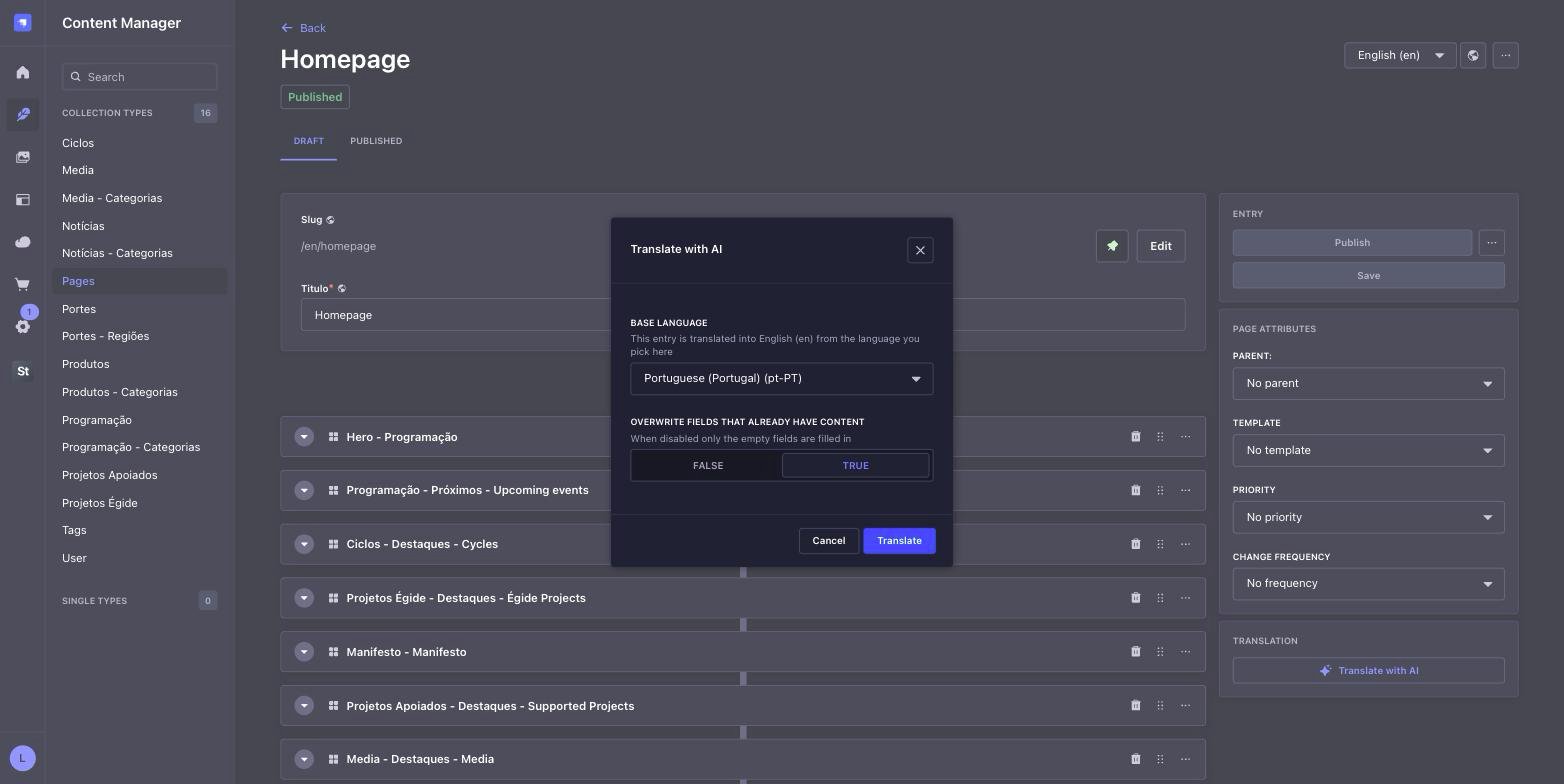
Repeatable components and dynamic zones are matched position by position, and only when both languages hold the same
component in the same place. When the document that is open has a different structure from the base language, the
fields that find no match are reported in the summary instead of being written to the wrong place. Filling the new
language in from another one first, with the Strapi locale actions, gives the two documents the same structure.
API
To get the data from the frontend, use your preferred HTTP client:However, if you prefer, you can use our ready-to-go Next.js frontend as a base, which already implements these solutions.
Frontend
Learn how our frontend streamlines integration with Strapi by automating repetitive tasks.
Hosting
Explore our hosting solutions for staging and production environments.